

Where Is Levels In Photoshop

Photoshop's Levels Image Adjustment Essentials
And then far in this series on tone and color correction in Photoshop, we've looked at the 3 almost basic and fully-automated image adjustments, Auto Tone, Auto Contrast and Auto Color. We then took things upwardly a notch past learning how to improve the overall brightness and contrast of an image with the aptly-named Brightness/Contrast command, and nosotros learned how to restore hidden particular in photos that suffer from as well much dissimilarity using a Shadows/Highlights adjustment.
While each of these image adjustments has its place, i downside they all share is that they lack the sort of precise control we need for professional person-level image correction. Sure, Brightness/Contrast and Shadows/Highlights are powerful, and even Auto Tone, Automobile Contrast and Automobile Colour can produce cracking results with the right images. Only the truth is, there's nix nosotros tin achieve with whatever of those adjustments that we couldn't achieve on our own with even better, more professional tools.
We've already taken our commencement stride towards professional-level epitome correction past learning how to read and understand image histograms, and I highly recommend y'all read through that tutorial earlier you continue. Histograms evidence united states of america where the electric current tonal range of our paradigm falls between pure black and pure white, making it easy to spot potential problems such as poor overall contrast or shadow and highlight clipping. In this tutorial, nosotros'll take what nosotros've learned about histograms and run across how to easily improve the tonal range of an image using a Levels aligning in Photoshop!
To become a good sense of how the Levels adjustment works, rather than jumping in and correcting an actual paradigm, permit'southward starting time with something more unproblematic; we'll "correct" a black-to-white gradient. I know, information technology sounds crazy, but the gradient volition get in easy for u.s.a. to encounter what's happening as we make adjustments in the Levels dialog box. Once we've covered the details of how Levels works, we'll look at a real world instance of how Levels can exist used to quickly amend contrast and restore shadow and highlight particular in a photograph.
Here's the gradient I accept open in Photoshop. Imagine that this is supposed to be a black-to-white gradient. In other words, it should start with pure black on the far left and gradually transition to pure white on the far right. But that's not what we're seeing. Instead of blackness on the left, we have a lighter shade of gray. And instead of white on the correct, nosotros have a darker (than white) shade of gray. Without whatever true blacks or whites, the gradient appears faded and dull, resulting in poor contrast. Even though nosotros're looking at a simple gradient hither, this is a common problem that many photos suffer from, whether information technology's because the image was under or over-exposed or because information technology'due south an older photo that has faded over time. It'south also exactly the type of problem that Photoshop's Levels adjustment was designed to correct:
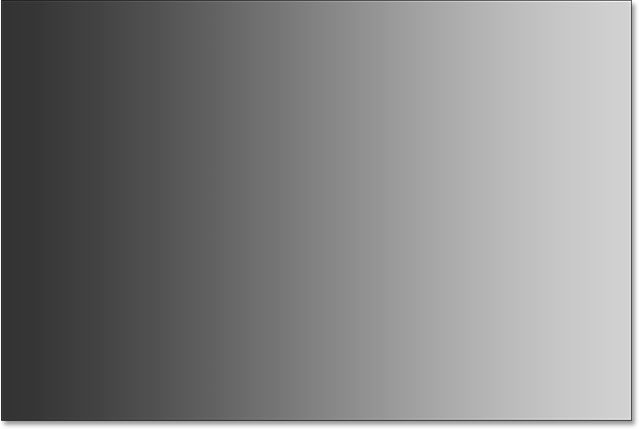
A black-to-white gradient that needs some assist.
There's a few unlike ways that we can apply Levels to an image. The simplest, and the way nosotros'll be using here, is to utilise Levels as a static adjustment; that is, applying it direct to the layer itself. Another way we can utilize Levels is as an aligning layer which has the advantages of being both fully-editable and non-destructive. And, new in Photoshop CC 2015, nosotros can now apply Levels (and whatsoever of Photoshop's other image adjustments) equally an editable Smart Filter! We'll learn how to apply Levels equally an adjustment layer and a Smart Filter in the adjacent tutorials. For now, our focus is on how Levels works, so nosotros'll proceed things simple and utilise it equally a normal, static adjustment.
If we look in my Layers panel, we see that my gradient is sitting on the Groundwork layer, currently the just layer I have in my document:

The Layers panel.
Since we're going to apply Levels direct to the layer itself, which makes permanent changes to the pixels in the image, the first affair nosotros should do is make a copy of the Background layer. That way, we'll exist able to work on the re-create without affecting the original paradigm. To make a re-create of the layer, I'll get up to the Layer menu in the Menu Bar forth the peak of the screen, choose New, and then choose Layer Via Re-create. I could also select the same New Layer Via Copy command directly from my keyboard past pressing Ctrl+J (Win) / Control+J (Mac). Either fashion works:

Going to Layer > New> Layer Via Copy.
Photoshop makes a copy of the layer, names it "Layer 1" and places it higher up the original:

The Layers panel showing the re-create in a higher place the original Background layer.
While I'thousand at information technology, I'm going to rename the new layer past double-clicking straight on its proper noun to highlight it. Since we'll be applying a Levels adjustment to this layer, I'll change its proper noun from "Layer 1" to "Levels". To take the proper noun modify, I'll printing Enter (Win) / Return (Mac) on my keyboard:

Giving layers more descriptive names is a good habit to get into.
Selecting A Levels Image Adjustment
Now that we'll be working on a copy of the image, we can safely apply a Levels adjustment. To select Levels, I'll go up to the Image menu at the top of the screen, choose Adjustments, so choose Levels:

Going to Epitome > Adjustments > Levels.
This opens Photoshop'due south Levels dialog box, the same dialog box we used in the previous tutorials to aid us better empathize how image histograms piece of work:

The Levels dialog box.
Evaluating The Histogram
Merely to quickly recap, the histogram is the blackness graph that looks similar a mountain range in the heart of the dialog box, and it's showing us where and how the current tonal range of the image (in my case, the slope) is distributed betwixt black and white. If you look below the histogram, you'll see a black-to-white gradient bar. This bar shows the states the complete range of possible effulgence (tonal) values that the image can contain, from black on the far left to right on the far right. At that place'southward 256 possible brightness values in total, including blackness and white (with 254 levels in between).
Where the histogram appears directly above a effulgence level in the gradient bar below it, it ways we accept pixels in the prototype at that exact brightness level. Our eyes see differences between brightness levels as detail in the image, so in general, the more brightness levels nosotros take, the more detailed the paradigm appears. Histograms don't represent the actual number of pixels in the image (since virtually images these days contain millions of pixels, which would brand the histogram too large to fit on the screen). Instead, they simply give us a general overview of how many pixels in the paradigm are at a certain brightness level in comparing with other effulgence levels. The higher the histogram appears at a certain level, the greater the number of pixels we accept at that effulgence level. If no part of the histogram appears at a sure brightness level, information technology means we currently have no pixels in the image at that level.
Let'southward take a closer look at what my histogram is telling us nearly the slope. In a "typical" photo, what we'd usually like to encounter is a histogram that stretches all the way from pure blackness on the far left to pure white on the far right. That's unremarkably a sign that the image was well-exposed with lots of detail beyond the entire tonal range (shadows, midtones and highlights). Now, that's not always the case, as we learned when we looked at examples of low-key and high-cardinal images, but it's still a useful, general guideline.
Unfortunately, that'southward not at all what we're seeing here. Rather than stretching across the entire tonal range from left to right, my histogram appears all bunched upward in the middle. Notice that the left side of the histogram, which represents the darkest pixels in the image, doesn't first at the far left. In fact, it doesn't even come close. If we have that left border and follow it directly downwards to the gradient bar below it, we see that the left side actually starts over a lighter shade of gray. This is telling the states that we currently have no deep, dark blacks at all in the image. The darkest pixels are lighter than black:

The left side of the histogram starts at a lighter (than blackness) shade of gray.
Over on the other side, we encounter that the correct side of the histogram doesn't start at the far right (or anywhere close to it). Instead, if we follow that right edge straight downward to the gradient beneath it, nosotros see that it starts over a darker shade of gray, telling united states of america that there are currently no brilliant white highlights in the prototype. The lightest pixels are darker than white:

The right side of the histogram starts at a darker (than white) shade of grayness.
At present that we've examined the histogram, if we expect at my image (the gradient) again, we know that the reason it'southward not appearing as a black-to-white gradient at the moment is because, as the histogram showed us, nosotros don't have any black or white pixels in the prototype. The darkest pixels are currently lighter than blackness, and the brightest pixels are currently darker than white, resulting in poor overall contrast. Fortunately, as we're about to see, the Levels adjustment makes bug similar this piece of cake to fix:
The shadows need to be darker and the highlights need to exist lighter. Levels to the rescue!
Adjusting The Shadows With The Black Indicate Slider
How can nosotros improve the tonal range using Levels? If you wait directly beneath the histogram "box" (that window the histogram appears in), you'll see three little icons. In that location's a black one on the far left, a white one on the far right, and a grayness one in the center. These icons are really sliders, and each one represents a different part of the tonal range. The one on the left is the black point slider. It'southward used to set a new black point for the image. The one on the right is the white signal slider, and it'due south used to prepare a new white indicate for the image. The ane in the middle is technically known as the gamma slider but it'due south easier just to think of it as the midtone slider. It's used to lighten or darken the midtones:

The black point (left), white signal (right) and gamma, or midtone, slider (middle).
Let'southward kickoff with the black point slider on the left. Every bit I mentioned, this slider is used to set a new black point for the prototype, but what does that hateful? Well, we know that the left edge of the histogram shows u.s. how dark the darkest pixels currently are in the prototype, and my histogram is telling us that the darkest pixels, which should be blackness, are not even close to blackness. At that place's a large gap between the left edge of the histogram box and the left edge of the histogram itself, and that empty space means we're missing particular in those tones:

The gap to the left of the histogram means we're missing shadow detail.
What nosotros need is a way to shut up that gap. In other words, we need to take the darkest pixels in the image, at whatever their electric current brightness level is, and drag them all the style down to black, and we can do that hands using the blackness point slider. All nosotros need to do is click on the black indicate slider and elevate it over to where the left border of the histogram begins:

Dragging the blackness signal slider to the left edge of the histogram.
You'll notice that as you drag the blackness betoken slider towards the right, the number in the box below it (the box on the left, which represents the current blackness signal value) increases. Information technology starts at 0, which is the default tonal value for black, and in my case, by the time I reached the left border of the histogram, the number had increased to 50. This means that before I made whatsoever adjustments, the darkest pixels in my image were no darker than brightness level 50. There were no pixels at all at brightness levels 0 through 49, which means we were missing the fifty darkest possible tonal values! By dragging the blackness point slider to level fifty, what we're proverb to Photoshop is, "Take all the pixels in the image that were originally at brightness level 50 and darken them to pure black". In other words, darken them to level 0. This is what we mean by "setting a new blackness point". In this case, we're maxim that whatsoever pixels at or below a effulgence level of 50 should now exist black:

The black indicate has been increased from 0 (the default) to brightness level 50.
Allow's take a look at my gradient to run into what's happened. Find that the left side is at present actually black rather than a lighter shade of grey. Any pixels that were originally level 50 accept been darkened all the way down to level 0. Detect also that the alter did non just affect the pixels that were at level 50. Photoshop went ahead and redistributed the other tonal values also to go along the transitions between brightness levels equally smooth as possible. Thanks to that one simple aligning with the black indicate slider, nosotros now take lots of shadow detail:

After setting the new black point, the left side of the gradient is at present as night as it should be.
Adjusting The Highlights With The White Point Slider
The white indicate slider beneath the far right of the histogram box works the same manner, except that it lets us set a new white point for the prototype. My histogram is showing a large gap betwixt the right side of the histogram box and the right edge of the histogram itself, so we know that we're missing a lot of item in the highlights. The brightest pixels are not even close to being pure white:

The gap to the right of the histogram means we're missing highlight detail.
To fix that, all we need to practise is click on the white bespeak slider and drag information technology over to where the correct edge of the histogram begins:

Dragging the white point slider to the right edge of the histogram.
Yous'll notice that every bit y'all drag the white point slider towards the left, the number in the box beneath information technology (the box on the right, which represents the current white point value) decreases. It starts at 255 (the default value for white), and past the time I reached the right border of the histogram, the number had decreased to 210. This means that the brightest pixels in my image were no lighter than level 210. There were no pixels at all at brightness levels 211 through 255, which means we were missing the 45 brightest possible tonal values! By dragging the white point slider to level 210, we're telling Photoshop, "Take all the pixels that were originally at brightness level 210 and lighten them to pure white". In other words, lighten them to level 255. This is what "setting a new white point" ways. We're saying that any pixels at or above a brightness level of, in this case 210, should now be white:

The white betoken has been lowered from 255 (the default) to brightness level 210.
If we look once more at my slope, nosotros come across that the right side is at present nice and brilliant. Photoshop took all the pixels that were originally at level 210 and fabricated them white. And simply every bit it did with the black signal, it redistributed the other tonal values for us, keeping the transitions between levels nice and smoothen. Past simply dragging the black and white point sliders in towards the edges of the histogram, nosotros've corrected the tonal range, boosting contrast and giving us a true black-to-white gradient:

Later on setting the new white point, the correct side of the gradient is now white.
Adjusting The Midtones With The Midtone Slider
You lot'll often observe that once you've gear up your new black and white points, the prototype now looks either too night or besides calorie-free and washed out. That's because adjusting the black and white points usually affects the midtones in the epitome as well. To set that, all we need to do is drag the midtone slider (the gray slider in the center, also known as the gamma slider). In the case of my slope, we're non really seeing a problem with the midtones, just we tin still use it to help united states of america get a sense of what result the midtone slider has on an prototype.
The midtone slider is just as easy to use every bit the other two sliders, but it works a bit differently. It also behaves opposite to what you might expect which tin can lead to some confusion. Different the black betoken and white bespeak sliders which let us to gear up specific tonal values for the new black and white points (in my case, I set my black point to level 50 and my white betoken to level 210), the midtone slider does non work with bodily tonal values. This is the main reason why many Photoshop users are dislocated by information technology. Permit'southward take a closer expect.
The box direct below the midtone slider represents its current value. Notice that its default value is 1.00. Right away, something seems different here. I hateful, what's with the decimal? The other ii values don't have decimals. How can a effulgence value accept a decimal?

The midtone slider with its odd default value of 1.00.
Also, if at that place'southward 256 possible brightness values in a histogram, with black at 0 on one terminate and white at 255 on the other, how does it make sense that the midtone value (that is, the value directly between blackness and white) would exist i.00? Shouldn't it exist something closer to 128? The answer is yeah, it should be something closer to 128, if the number represented an actual tonal value. But it doesn't. The number in the box is actually an exponent (recall math, as in "2 to the power of eight"). And rather than setting a specific tonal value similar we did with the black bespeak and white point, dragging the midtone slider adjusts what'south known as the gamma curve (which is why the technical name for the midtone slider is the gamma slider).
Don't worry, there's no need for us to dust off our math books or go into a detailed explanation of gamma curves. You don't need to know anything technical to use Levels. All we really need to know to avoid confusion is that the number in the midtone box does non stand for an actual brightness level.
So if it's non a brightness level, how practice we use information technology? The simplest mode to remember of the midtone value is that, at its default of one.00, we're not making whatsoever changes at all to the midtone brightness. Any value above i.00 will increase the brightness of the midtones. The higher the value, the brighter they'll announced. Any value below 1.00 will darken the midtones. The lower the value, the darker they'll appear. One important note is that the midtone slider has no outcome on the black point and white point. Information technology just affects the brightness of the tones in betwixt.
To show yous what I mean, I'll click on the midtone slider and drag it towards the left, increasing its value from one.00 to 1.fifty:

Increasing the midtone value by dragging the slider towards the left.
By dragging the slider to the left and increasing the midtone value, I've brightened the midtones in the image (or in this case, the gradient). Here, we can see a "before and later" comparison. The bottom half of the image is the original slope, earlier any adjustments were made to the midtones. The top half shows the event after dragging the midtone slider to the left. Observe that the black and white areas on either end oasis't changed. The midtone slider had no result on the blackness and white point values I set earlier. However, the tones in between black and white now announced lighter than they did originally:

A before (bottom) and later (acme) comparison of the midtones after dragging the slider towards the left.
I mentioned before that the midtone slider behaves reverse to what yous might expect. You may think that dragging the midtone slider towards the left, which moves information technology closer to black, would darken the midtones. After all, we don't commonly think of black when trying to lighten something. But, as we've just seen, it does the opposite. Dragging the midtone slider towards blackness increases the midtone value, and increasing the midtone value causes the midtones to become brighter, not darker.
This time, I'll drag the midtone slider towards the right, which lowers the midtone value. I'll elevate information technology down to 0.50:

Decreasing the midtone value by dragging the slider towards the right.
And here's the "before and after" comparison of what's happened. The original gradient (without any midtone adjustments) is on the bottom and the adjusted version is on the elevation. Once again, the midtone slider had no effect on the black and white points, but the tones in between at present announced darker. Again, this seems like the opposite of what y'all might expect. Dragging the midtone slider towards white feels like it should be lightening the midtones, when in fact, it darkens them. It's easy to get things mixed up with the midtone slider, and then if you ever find yourself dragging it in the wrong management, merely stop, drag it in the opposite direction and say to the person looking over your shoulder, "Just checking to run into if you're paying attention":

The midtones now appear darker (top) than they were originally (lesser) after dragging the slider to the right.
A Existent Earth Example
At present that we've covered the details of how Photoshop'south Levels adjustment works, let's take everything we've learned and use it to rapidly amend the tonal range of an image. Hither's an old photo I've scanned into Photoshop. The prototype has faded over fourth dimension and is now suffering from depression contrast due to a lack of any existent shadows or highlights. Fifty-fifty though I'll be correcting a black and white image here, you lot can utilize the exact same steps with full color images:

An old photo scanned into Photoshop.
Step 1: Duplicate The Groundwork Layer
Here, we see the photo sitting on the Groundwork layer in the Layers panel:

The photo on the Background layer.
Using the same steps we covered earlier, since I'll be applying Levels as a static adjustment, the first affair I'll do is make a re-create of the Background layer. To make the re-create, I can either go up to the Layer bill of fare at the top of the screen, choose New, then choose Layer Via Copy, or I can use the faster keyboard shortcut, Ctrl+J (Win) / Command+J (Mac). Photoshop makes the copy, names information technology "Layer 1" and places it above the Background layer:

A re-create of the prototype appears above the original.
Since information technology's always skillful to give layers descriptive names, I'll chop-chop double-click on the new layer's proper noun ("Layer 1") and change it to "Levels". To accept the name change, I'll press Enter (Win) / Return (Mac) on my keyboard. Nosotros now take our copy of the prototype to piece of work on so we're not making changes to the original:

Renaming the new layer "Levels".
Step ii: Add A Levels Image Aligning
To add a Levels aligning, I'll become up to the Paradigm menu, choose Adjustments, and so choose Levels. I could also select Levels directly from the keyboard by pressing Ctrl+L (Win) / Control+Fifty (Mac). Either style opens the Levels dialog box:

The Levels dialog box once over again.
Step 3: Evaluate The Histogram
I'll zoom in on the histogram, and but like with the gradient we looked at earlier, this histogram is showing united states of america that we currently have no black or white pixels in the image. The left side of the gradient starts at a lighter (than blackness) shade of grey and the right side starts at a darker (than white) shade of gray. We have no detail at all in the darkest and lightest tones, which explains why the photo is lacking dissimilarity:

The histogram shows u.s.a. we're missing shadow and highlight detail in the image.
Stride 4: Drag The Black Indicate Slider
As we've learned, at that place's 3 uncomplicated steps to correcting this prototype. First, nosotros set a new black point. Second, nosotros set a new white point. And third, nosotros lighten or darken the midtones as needed. I'll beginning with the black bespeak by clicking on the blackness bespeak slider and dragging it over to where the left border of the histogram begins. Discover that the blackness betoken value in the box on the left increases from 0 to a level of 42. This means Photoshop is going to take all the pixels that were originally at brightness level 42 and darken them to level 0, making them blackness:

Dragging the blackness bespeak slider to the left edge of the histogram.
Here's the photo after setting the new black point. Already, things are looking better with deep, nighttime blacks and lots of detail in the shadows:

The photo after correcting the shadows.
Step five: Elevate The White Indicate Slider
Side by side, I'll click on the white signal slider and drag it over to where the right border of the histogram begins. If yous wait closely, you lot'll see that the histogram is showing a few pixels just before the steep rise in the histogram, just I'm not going to worry about those. Instead, I'll drag the white indicate slider right up to where the bulk of the histogram begins. Notice that the white point value in the box on the right has decreased from level 255 to level 232. Photoshop will have all the pixels that were originally at level 232 and burnish them to level 255, making them white:

Dragging the white point slider to the right edge of the histogram.
And here'south the upshot. We've now corrected both the shadows and the highlights, giving the prototype a much needed boost in contrast:

The photograph subsequently correcting the shadows and the highlights.
Step vi: Drag The Midtone Slider
Nosotros've adjusted the black bespeak and the white bespeak, only now the image is looking besides night overall. To set up that, all we demand to exercise is lighten the midtones, and I tin can do that past clicking on the midtone slider and dragging it towards the left. Small increases or decreases in the midtone value can brand a big difference, so in most cases, yous won't need to drag the slider very far. Hither, I've increased the midtone value from information technology'southward default of 1.00 to a slightly higher value of one.15 (think, values higher than 1.00 lighten the midtones and values lower than 1.00 darken them).
Unlike setting the black indicate and white point where it's easy to come across where the left and right edges of the histogram brainstorm, the midtones are a flake more subjective. You actually need to continue an middle on the prototype as you drag the midtone slider and decide for yourself which setting looks all-time:

Dragging the midtone slider to the left to the lighten the midtones.
Here, after lightening the midtones, is my concluding effect:

The final epitome.
The Preview Option
Hither's a couple of quick tips when working with Levels. If, at any time, yous desire to compare your adjustments with how the image looked originally, just uncheck the Preview choice in the dialog box. With Preview unchecked, you lot'll meet your original, uncorrected photo in the main document area. Click inside the checkbox again to turn the Preview option dorsum on and view your adjusted version. You can as well toggle the Preview selection on and off by pressing the letter P on your keyboard:

The Preview option in the Levels dialog box.
Resetting The Sliders
If you don't like your settings at all and want to quickly reset the sliders to their default values, press and hold the Alt (Win) / Option (Mac) key on your keyboard. This will change the Cancel button into a Reset push. Click the Reset button to reset the sliders:

Press and hold Alt (Win) / Selection (Mac) to change Cancel to Reset.
Applying Your Settings To The Image
When yous're happy with your adjustments, click OK in the Levels dialog box to commit them to the layer and close out of the Levels dialog box (if y'all desire to close out of the dialog box without applying your settings, click Abolish instead):

Clicking OK to apply my settings to the layer.
Comparing The Original And Adjusted Versions
Once you've applied your settings, you can compare your adapted version of the image with the original by clicking the visibility icon (the eyeball icon) for the Levels layer in the Layers console:
Clicking the visibility icon for the Levels layer.
Clicking the visibility icon once will temporary hibernate the Levels layer in the certificate, revealing the original, uncorrected paradigm:
The original photo.
Click the visibility icon again to turn the Levels layer back on and view the adjusted version:
The corrected version.
And there we have it! In this tutorial, we covered the basics of how Photoshop'due south Levels adjustment works and how to apply it as a static aligning to correct overall tonal problems in the shadows, highlights and midtones of an image. Nevertheless there's nonetheless more than to learn! In the next tutorials, nosotros'll explore the Motorcar button in Levels, the black point, white point and gray signal eyedroppers, the important difference betwixt the Input and Output sliders, and more than! Plus, nosotros'll learn how to apply Levels not as a static aligning but as an editable, not-destructive aligning layer, and (new in Photoshop CC 2015) how to apply it as an editable Smart Filter!
Other Stuff
© 2022 Photoshop Essentials.com.
For inspiration, not duplication.
Site design by Steve Patterson.
Photoshop is a trademark of Adobe Systems Inc.
Source: https://www.photoshopessentials.com/photo-editing/photoshop-levels-image-adjustment-essentials/
Posted by: pedrozaandoing.blogspot.com
0 Response to "Where Is Levels In Photoshop"
Post a Comment